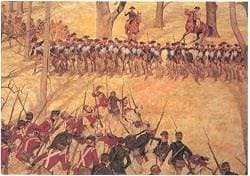
In continuing our discussion about the Southern Campaign of 1780–81, this vignette covers one of the most significant tactical victories during America’s War for Independence — the Battle of Cowpens.
The Loyalist militia’s crushing defeat at the hands of the Patriot militia at Kings Mountain in October 1780 convinced the often-cautious British commander, General Lord Charles Cornwallis, to postpone his movement into the Colony of North Carolina. In addition to controlling the port of Charleston and securing the South Carolina backcountry, Cornwallis was convinced that he had to bring the Colony of North Carolina under military control to set the conditions for a complete British military victory in the Southern Theater. In his book The Road to Guilford Courthouse, John Buchanan opines that “the great militia victory forced Lord Cornwallis to retreat to South Carolina and delayed his re-entry into North Carolina… and by then he faced an American general who had much to teach him about the art of war.”1 Cornwallis established his winter headquarters at Winnsboro, South Carolina, on 29 October 1780.
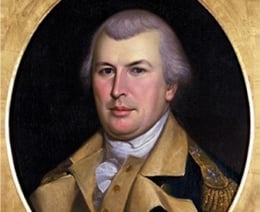
On 2 December 1780, General Nathanael Greene, General Washington’s former Quartermaster General, arrived in Charlotte and assumed command of the American Southern Department. Though Greene is not the primary subject of this vignette, it is worthwhile noting that he was both a student of grand strategy and is considered to have been a master of geography, supply, and transport. Unlike his predecessor, Greene understood that he did not have the forces and logistical support to defeat Cornwallis in the field. Therefore, he set out on a course of gaining a keen understanding of the North Carolina terrain and its river systems as a way of skillfully avoiding a decisive engagement against a superior force. Greene sought to assess, rest, resupply, and deploy his forces in such a manner as to influence Cornwallis to react to Greene’s movements.2
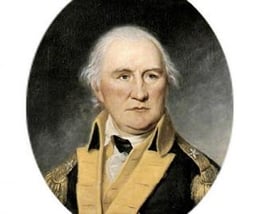
Due to Greene’s risky but innovative deployment of his limited forces, Cornwallis decided to allocate one of his most competent and determined leaders to deal with an unexpected threat — the deployment of Patriot General Daniel Morgan and his “Flying Army.” Coming out of retirement as a newly promoted Brigadier General, Daniel Morgan arrived at Greene’s headquarters in Charlotte on 3 December 1780. While Greene was encouraged by some to prepare for an attack on British forces, he decided not to take an offensive posture against Cornwallis. To sustain his army in the field, he divided his forces to enhance his troops’ ability to forage for supplies, and to present a visible threat to British outposts spread throughout the South Carolina backcountry.3 Greene’s orders to Morgan were simple: he could conduct operations “either offensively or defensively as your own prudence and discretion may direct.”4
A Sequence of Events
- 20–21 December 1780: Greene deployed the forces under his command to Cheraw, SC, by the Pee Dee River, while Morgan and his element headed for Grindal Shoals near the Pacolet River. By the time the Battle of Cowpens took place on 17 January 1781, Greene and Morgan — commanding two inferior-sized forces — were about 140 miles apart.
- 25 December 1780 – 15 January 1781: Morgan remained in the Grindal Shoals area. To improve his soldiers’ ability to forage for supplies, his mix of Continental and militia forces were further dispersed throughout the surrounding area.
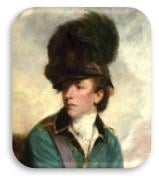
- 28 December 1780: Cornwallis decided to begin his movement into North Carolina, and once again the security of his left flank was paramount. This time he chose his tenacious 24-year-old cavalry leader, Lieutenant Colonel Banastre Tarleton, to both cover his left flank and to seek out Morgan’s forces and, in his words, “push him to the utmost.”5 Tarleton’s reputation preceded him — his destruction of 350 Virginia Continentals under the command of Colonel Abraham Buford at the Battle of Waxhaws had earned him the moniker of “Bloody Ban.”
- 12 January 1781: General Morgan learned that Tarleton was in pursuit of him. Concerned about an engagement with Tarleton, Morgan began moving his forces northwest with the intent of crossing the Broad River and seeking refuge in the area of Kings Mountain. Swollen rivers, streams, and washed-out roads continued to impede troop movements on both sides. Fearful of being attacked by a superior military force, Morgan sent a message to Greene on 15 January requesting permission to withdraw with his Continentals and leave the local militia forces to roam the backcountry. That message arrived at General Greene’s headquarters on 18 January — the day after Morgan’s victory at Cowpens.6
- 15–16 January 1781: Tarleton was closing in on Morgan’s location on the Pacolet River.
During the early morning of the 16th, Tarleton successfully crossed the Pacolet River. Patriot militia scouts warned Morgan of Tarleton’s approach, and Morgan decided to move his forces to a well-known location in the South Carolina backcountry — the Cowpens, an area used by cattle herders to stage their cows prior to moving them to market. In the afternoon of the 16th, Morgan walked the terrain of the Cowpens and, although he would have preferred to cross the Broad River to safer ground, he feared being caught by Tarleton in the midst of a river crossing. He decided to set up his defense in depth at Cowpens.7
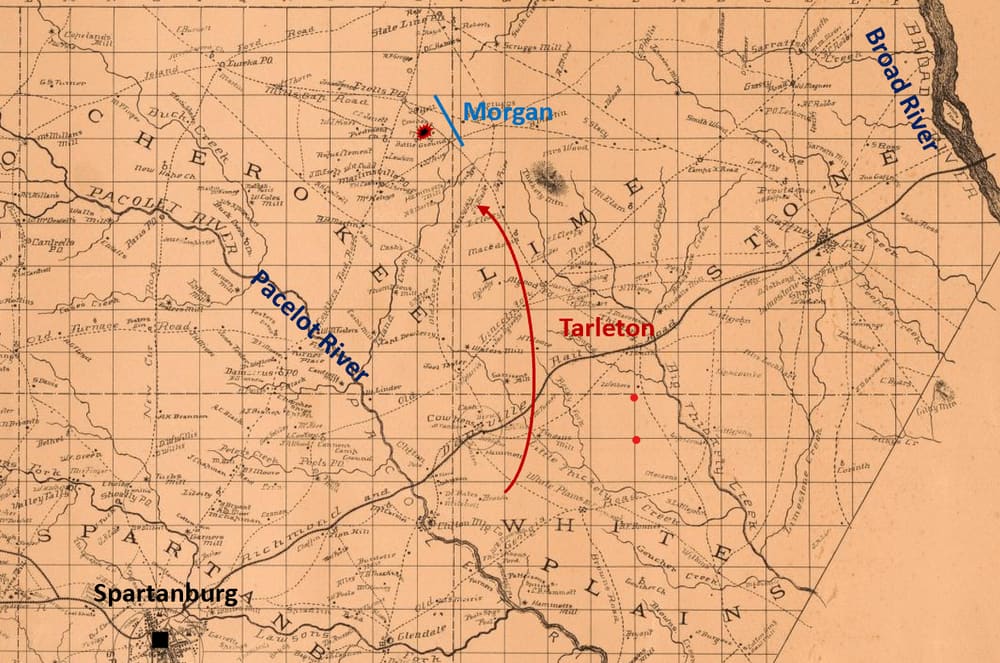 The routes of Morgan and Tarleton in the days before the battle, marked on an 1785 terrain map of South Carolina.8
A View of the Battlefield
The battle was fought as a series of semi-independent engagements. Morgan’s precise use of his militia forces and Colonel William Washington’s cavalry allowed Morgan to maintain constant pressure on Tarleton’s forces — Tarleton was never able to gain a true picture of the American defensive lines. The photographs below present different views of the battlefield as it stands today.
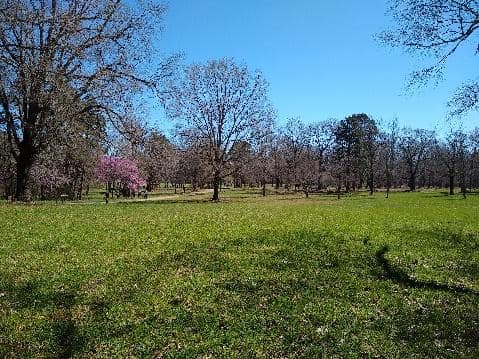 A view from Morgan’s Hill. Morgan and his cavalry commander, Colonel Washington (a second cousin of General Washington), viewed, commanded, and reacted to distinct phases of the battle from this location. The battlefield is about 500 yards long and 500 yards wide; the Green River Road ran along the left side of the picture and was the center line of the battlefield. At the time of the battle, the terrain was undulating and sparsely covered with trees, with cane breaks lining the low side of the Cowpens.
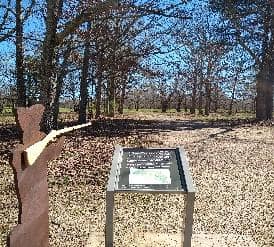 Lieutenant Colonel John Eager Howard’s Delaware and Maryland Continentals, and the Virginia State troops under Major Francis Triplett, occupied positions behind a ridgeline in a long swale. Howard’s Continentals remained out of view of Tarleton’s forces until later in the third and decisive phase of the battle. This is a view down the Green River Road toward the enemy.
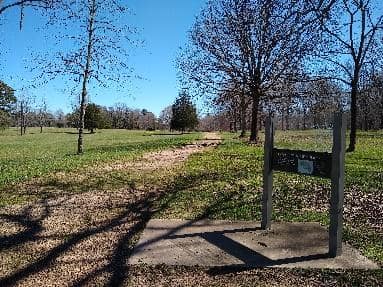 Militia units under the command of Colonel Pickens of South Carolina occupied a line about 150 yards to the front of Lieutenant Colonel Howard’s Continentals. Their mission was to use effective rifle fire to disrupt Tarleton’s attack without becoming decisively engaged — after firing one or two volleys, their orders were to pass through Howard’s Continentals and rally in the rear on Morgan’s Hill as a mobile reserve.
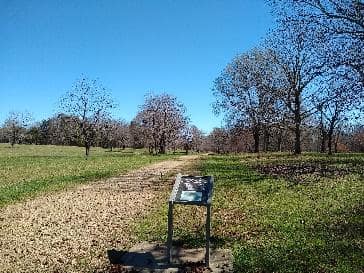 The most forward line of Morgan’s defense was the skirmish line — handpicked sharpshooters from North Carolina and Georgia, personally placed in position by General Morgan. Their task was to direct accurate rifle fire at officers and sergeants as the British attempted to form up in battle formation, roughly 100 yards to the front of Colonel Pickens’ militia line. Their actions caused Tarleton to hastily deploy his forces for combat, and afterward they rejoined Pickens’ line for the next phase of the battle.
American rifle fire was so effective that by the time Colonel Pickens’ militia line conducted an orderly withdrawal, Lieutenant MacKenzie of the 71st Highland Infantry asserted that “two-thirds of the British infantry officers had already fallen, and nearly the same proportion of privates.”9
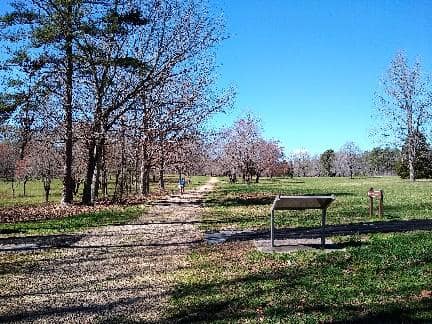 Tarleton’s initial view of the battlefield as his forces exited the wood line. The Patriot sharpshooters were set on a line located near the crop of trees in the center of the picture, using the trees for cover. Tarleton, in his usual fashion, conducted a quick assessment of the battlefield, recognized militia to his front, and assumed it would be an easy victory. Without allowing his forces to properly deploy for battle, he rashly ordered an element of his Legion Cavalry to disperse the skirmishers — fifteen of his troopers were shot from their horses, the rest of the dragoons fled the field, and the skirmish line continued laying fire on the British infantry.
An Overview of the Battle
Morgan’s camp was buzzing with activity throughout the night of the 16th as men and militia units converged on Cowpens, eager to take the fight to Tarleton. Morgan personally visited his soldiers unit by unit, both to motivate them and to ensure they understood their battle tasks for the next day.
Due to his aggressive reconnaissance on the 16th and the capture of a Patriot militia colonel, Tarleton was keenly aware of Morgan’s location and his intent to withdraw to the Broad River. When in pursuit of the enemy, Tarleton knew no fatigue, and as Buchanan states, Tarleton’s “prey was near.”10 With little rest, Tarleton’s forces began their grueling three-hour march toward Cowpens at around 3:00 a.m. on 17 January 1781.
From a force-on-force perspective, the number of soldiers on both sides was about the same — 970 under Morgan and 1,050 under Tarleton. From a quality standpoint, at least on paper, Tarleton’s forces, predominantly British Regulars, had the advantage. However, Colonel John Eager Howard’s Maryland and Delaware Continentals were among the most battle-hardened units in the Continental Army. The question would be: how would Morgan’s militia perform?
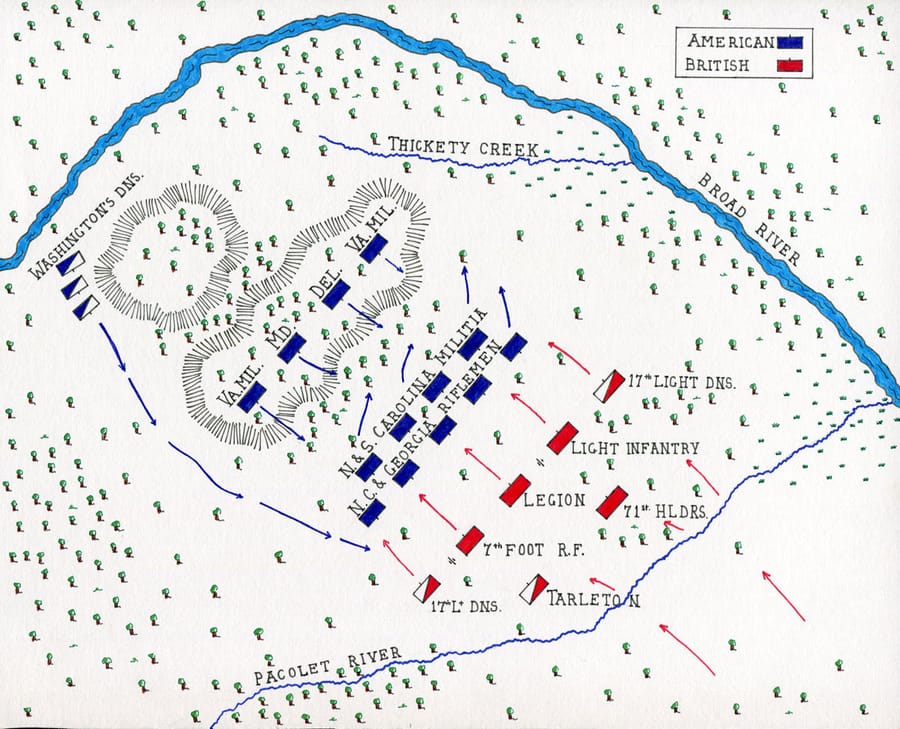 Sketch of the Cowpens battlefield.11
Phase 1. With his scouts reporting Tarleton’s lead elements approaching around 5:30 a.m., Morgan began setting his forces in place. His orders to the skirmish line were to focus accurate rifle fire at the British forces as they moved into battle formation — taking out officers and sergeants in hopes of disrupting Tarleton’s deployment and hindering effective command and control of his infantry units.
It is important to highlight that, from Tarleton’s experience in the Southern Theater, once Patriot militia elements came under fire and a bayonet charge from British Regulars, they usually collapsed and fled the battlefield. So, at around 6:45 a.m., when Tarleton recognized local militia elements strung out along a line immediately to his front, he assumed he could easily disperse them, causing chaos among the Patriot forces.
After the militia sharpshooters quickly repelled the attack by his Legion cavalry, Tarleton, before accurately assessing Morgan’s defenses, unwisely set his infantry in motion. Holding the battalion of the 71st Highlanders in reserve, Tarleton began his hasty attack, leading with elements of the 7th Fusiliers and the 16th Light Infantry, flanked by troops of the 17th Light Dragoons. With their mission complete, the sharpshooters moved back to Colonel Pickens’ militia line.
Phase 2. After setting Colonel Pickens’ militia line, Morgan’s intent was clear: do not fire until the enemy was about 50 yards to their front, fire one or two volleys, and then withdraw in an orderly fashion through Howard’s Continentals to form up as a mobile reserve. Do not become decisively engaged.
With the British infantry closing quickly on Pickens’ line, Morgan gave the order to fire. In contrast to British musket fire, which crackled through the trees above the Patriots’ heads, Pickens’ men fired with overwhelming accuracy. Pickens’ militia initially stunned the attacking British infantry — but they were resilient, readjusted their lines, and pressed the attack.
Tarleton dispatched elements of the 17th Light Dragoons to attack what appeared to be a collapsing line of defense. Troopers from Colonel Washington’s 3rd Continental Dragoons quickly responded, and after having initial success, Washington’s troops repelled the attacking cavalry. Washington’s quick actions throughout the battle played a key role in Morgan’s success.
Phase 3. The battle went on for about 40 minutes, and the Patriot militia performed admirably. After passing through Howard’s Continentals, with some persistence on the part of Morgan and Pickens, the remainder of the militia formed up on Morgan’s Hill.
At around 7:40 a.m., the main and decisive part of the battle took place. Once again, British infantry misread the orderly withdrawal of the militia, and with a breakdown in company-level leadership, the British infantry continued their somewhat uncoordinated attack. The 71st Highlanders had joined the attack and were pressing the American right flank. As they crested the ridgeline, they came into contact with determined Continentals of Colonel Howard’s line, who had been positioned by Morgan on the reverse slope of a ridgeline, outside of Tarleton’s sight, in a long swale.
The Continentals’ initial volley was so stunning that it temporarily caused the attacking infantry to falter. However, with his right flank under pressure from the 71st Highlanders, Colonel Howard ordered an adjustment to his line, which gave the appearance of a complete withdrawal. Morgan, observing this, immediately rode to Howard. Although Howard’s orders appeared to have been misunderstood, he quickly retained control of the movement.
The 71st, believing it was a withdrawal, conducted an assault, albeit a chaotic one. Colonel Washington, observing from Morgan’s Hill, instantly sent a rider to Howard, informing him that the 71st was attacking like a “mob,” and that Howard should turn his force about, fire, and Washington would assist by conducting a mounted attack on the flank of the Highlanders. Morgan yelled, “Give them one fire and the day is ours.”12
With the 71st Highlanders some 30 yards away from the Continentals, screaming as they continued their assault, Colonel Howard gave the order to halt, turn about, and fire. The Continental volley was so devastating that many of the Highlanders fell to the ground to surrender, while others attempted to flee the battlefield.
Sensing victory, Howard gave the order to conduct a bayonet charge. The collapse of the 71st Highlanders ensued, while Colonel Pickens quickly moved his mobile reserve around Howard’s right flank, completing a double envelopment of the surrendering British forces.
In a final effort to save himself from utter defeat, Tarleton ordered 200 of his Legion cavalry to charge — they refused the order. Elements of the 17th Light Dragoons followed Tarleton into battle, but they were quickly cut off by Colonel Washington and his 3rd Continental Dragoons in a counterattack.
Within approximately one hour, the supposed easy victory for Tarleton had turned into a complete disaster. Of the 1,050 soldiers under Tarleton’s command, 110 were killed, 229 wounded, and 600 were captured. Of Morgan’s 970 soldiers in the field, 24 were killed and 104 wounded.
Aftermath
Although Tarleton escaped, he lost more than 80 percent of his unit. From a strategic perspective, once more Cornwallis’ effort to enter North Carolina was thwarted by Patriot forces. Operationally, Tarleton’s defeat had a direct impact on Cornwallis’ light forces, as Tarleton’s Legion had played a key role as Cornwallis’ lead reconnaissance element.
For his victory at Cowpens, Morgan was awarded the Congressional Gold Medal. Colonels Washington and Howard received Congressional Silver Medals, and Colonel Pickens received a sword.
Though Morgan once again went into retirement due to ill health soon after his victory at Cowpens, it was his defeat of Tarleton that allowed General Greene to conduct retrograde operations through North Carolina over the ensuing months, with Cornwallis in pursuit — it would become known as the Race to the Dan River.
In the end, due to an inability to sustain his army in the field, Cornwallis decided to head to the port of Yorktown, Virginia, where his army could be resupplied. Rather than reconstituting his army, Cornwallis’ forces were placed under siege and attack by a combined French and American force under the command of General Washington. On 19 October 1781, Cornwallis’ army surrendered to General Washington.
When assessing the importance of Cowpens, Andrew Waters quotes historian David Ramsay: “Tarleton’s defeat was the first link, in a grand chain of causes, which finally drew down ruin, both in North and South Carolina, on the royal interest.”13
Philip R. Thieler
Footnotes
-
John Buchanan, The Road to Guilford Courthouse: The American Revolution in the Carolinas. New York: John Wiley & Sons, Inc., 1997, 241. ↩
-
Lawrence E. Babits, A Devil of a Whipping: The Battle of Cowpens. Chapel Hill & London: The University of North Carolina Press, 1998, 6–7. ↩
-
Buchanan, op. cit., 296. ↩
-
Buchanan, op. cit., 306. ↩
-
Buchanan, op. cit., 312. ↩
-
Babits, op. cit., 53. ↩
-
Library of Congress, accessed via https://www.loc.gov/resource/g3913s.ct009932. ↩
-
Library of Congress, accessed via https://www.loc.gov/resource/g3913s.ct009932. ↩
-
Babits, op. cit., 92. ↩
-
Buchanan, op. cit., 314. ↩
-
Museum Facts UK. ↩
-
Andrew Waters, To the End of the World: Nathanael Greene, Charles Cornwallis, and the Race to the Dan. Yardley, Pennsylvania: Westholme Publishing, 98. ↩
-
Waters, op. cit., 102. ↩